Showing posts with label Reduce Reuse Recycle ideas for kids. Show all posts

Monday, January 11, 2016

Pack N Go Kitchen Tutorial

So Santa brought me a Silhouette for Christmas .. ok well to be totally truthful Santa brought my BFF a new Silhouette Cameo for Christmas and so Santa re-gifted me her ole Portrait but it is new to me and I am looking forward to getting to know it better! So I have been looking on Pinterest and other groups for ideas on how to make great use of it and came across this cool option! 

Image Source and full tutorial here
The Pack-n-go Kitchen ~ using vinyl to help it stick to the top of a Rubbermaid storage container. These would be perfect for homes with small spaces, the grandparents house or taking camping or to the cottage where you want them to have stuff to play with but not a lot of space! 

Plus the lovely creators at Printable Cuttable Creatables are offering this SVG file to make this FREE  along with the step by step tutorial to walk you through it! 

I have not gotten any vinyl yet but I am totally pinning this for future reference! 

Have an amazing day!


Margaret
Live Well, Laugh Often, Love Much


Thursday, December 17, 2015

Rustic Christmas Tin Can Decor

Decorated Garland with Rustic Charm
I just love 'rustic' look ~ on my Vision board I have a big ole country ranch style farm house with wrap around porch and lots of garden areas and greenery that will be come to life at night with the twinkle of fairy lights! 

Inside it would be filled with Rustic charm of antiques and country decor all year long! Things like these gorgeous upcycled Tin Can Christmas garland that I made will adorn the big fireplace mantel and French doors.

These ones I made here are Christmas themed but you can totally create whatever you want for year round enjoyment both inside and out .... I think they would look lovely with Dragonflies and Butterflies around a country porch in the warmer months and one day when my country ranch farm home manifests and I have a wrap around porch to decorate I will so be making some more of these for outside! 


They are really easy to make! I made mine before I started the blog so did not think to take 'step by step' pictures so I apologize for not having my own work to share here HOWEVER cause I know many are visual learners I found this cool video that shows the basics although they draw directly on the can and than spray painted the cans to color them ~  I like the 'tin look' so I prefer to tape on a stencil because it leaves the 'clean look' with no marker left around the holes.


 Rustic Tin Can Home Decor

What You Need
  • Tin Cans - if you have anal spatial issues like I do choose ones that are the same size.
  • Hammer and long pointed end nails
  • Stencils of the designs you want ~ hearts, stars, words ... even saw a sample of Star Wars inspired tin can decor on Pinterest recently
  • Freezer space
  • Work space you do not mind getting 'wet' while you work
What You Do
  • Soak off labels and glue from cans so they are well cleaned.
  • Fill them with water and place in freezer until solid
  • Prepare your stencils ~ you want them to be on a piece of paper that is cut to the size of your tin can so that they can be wrapped tightly around and secured with removable tape so they do not 'move' while you are working.
  • Take out one tin can at a time to work with.
  •  Wrap your stencil around it ~ make sure you have the orientation correct! So if you are planning to have them 'sit' with a tea light than have your stencil top facing the top of the opening if you plan to hang them you want the stencil top to be facing the 'closed' end of the can.
  • Using the Hammer and Nail carefully hammer in holes along the stencil pattern at regular intervals about a 1/4 inch apart. 
  • If you are wanting to hang them from lights use the hammer and nail to punch a hole in the top centre of the can ~ you can make this opening 'larger' later once you remove the ice. 
  • Once you have your design perfected and are happy run the tin can under warm water until ice slides out and let it sit to air dry.
  • You can make your holes bigger now by gently pushing your nail through the tin can and wiggling it ~ you want to be gentle so you can do this without affecting its shape. 


Star Shaped Tin Can Decor
Snowflake Shaped Tin Can Decor
Words on a Tin Can Decor
Rustic Christmas Tin Can Decor
  
 What is YOUR favorite look for Christmas time? Rustic or modern colored or traditional red and green theme or the eclectic look of heirloom ornaments you have collected?


Have an amazing day!

Margaret
Live Well, Laugh Often, Love Much
Be Totallyawake4-life


Saturday, December 12, 2015

Santa's Little Secret ~ Old Toys New Joys

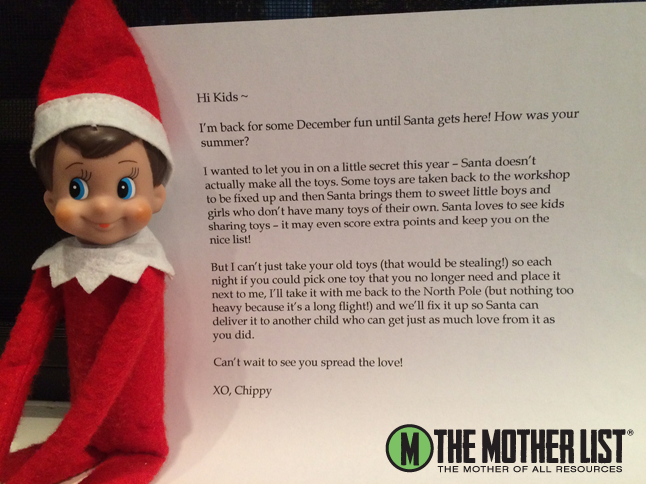
I was totally inspired by the MotherList's  the New Elf on the Self Tradition that went viral earlier this month that I just had to adapt and build on it for myself for use with the crew! 


Ian the Elf came up with this poem to help explain the Secret of Santa Claus and we are going to purge some of the playroom toys that are rarely used anymore and help them find a new home this holiday season!

Old Toys New Joys

I wanted to let you in on a little secret about how Santa works
Now that you are ‘growing up big’ learning this secret is one of the perks
Santa is magic, why yes indeed,
But even he cannot make all the toys that the children of the world might need!
So Santa does not actually make all the toys from brand new
Sometimes he asks for help from boys and girls like you.
He asks that you look through the toys that you no longer use
The cars, and trinkets and maybe your old Blue’s Clues
Leave one each night for me to take back
And Santa will fix it up and add it to his Santa Sack.
This is how your old trinkets and toys
Can become new gifts and Christmas Joys!


Christmas does not need to be about 'commercialism' it really is about focusing on our PRESENCE in the community not the PRESENTS!!

Have an amazing day!

Margaret
Live Well, Laugh Often, Love Much